Configure a MySQL connection to Florentine.ai via phpMyAdmin
This guide will take you through all the necessary steps needed to connect a MySQL database via phpMyAdmin to Florentine.ai:
- Log in to phpMyAdmin
- Create a readonly user
- Grant database access
- Grant network access
- Create the connection string
Important
Your MySQL instance must be running on a remotely accessible server. Florentine.ai is a cloud-based service and cannot connect to localhost or 127.0.0.1.
Log in to phpMyAdmin
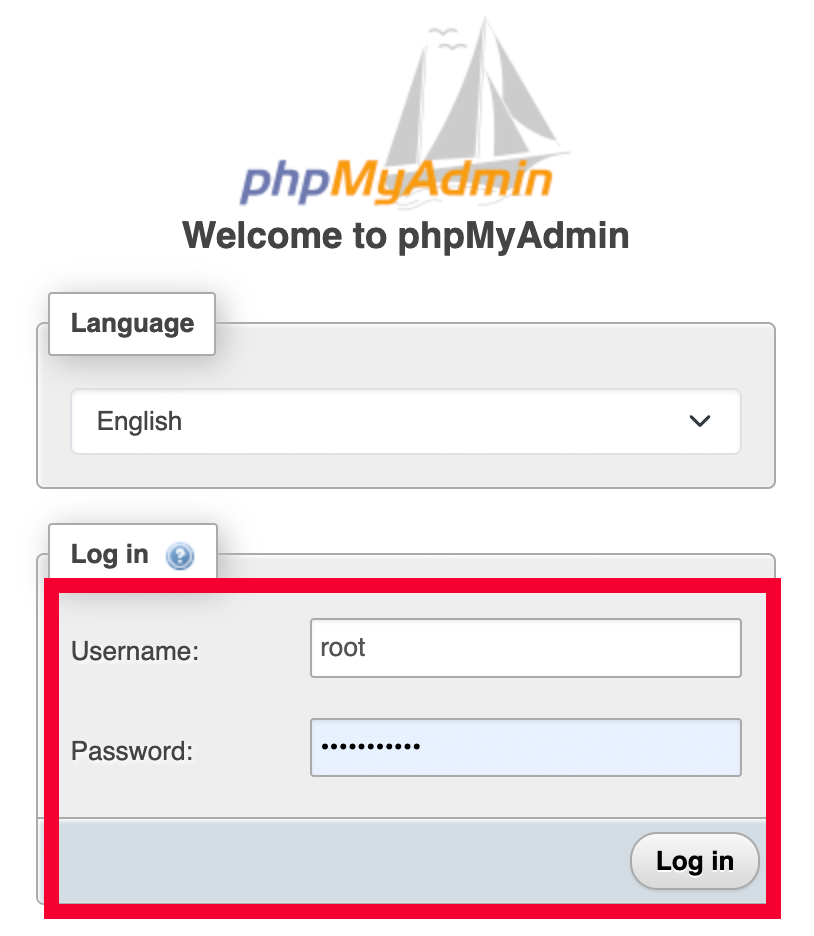
Start by navigating to your phpMyAdmin (usually found at https://yourdomain.com/phpmyadmin) and log in with your MySQL root/admin credentials:
Create a readonly user
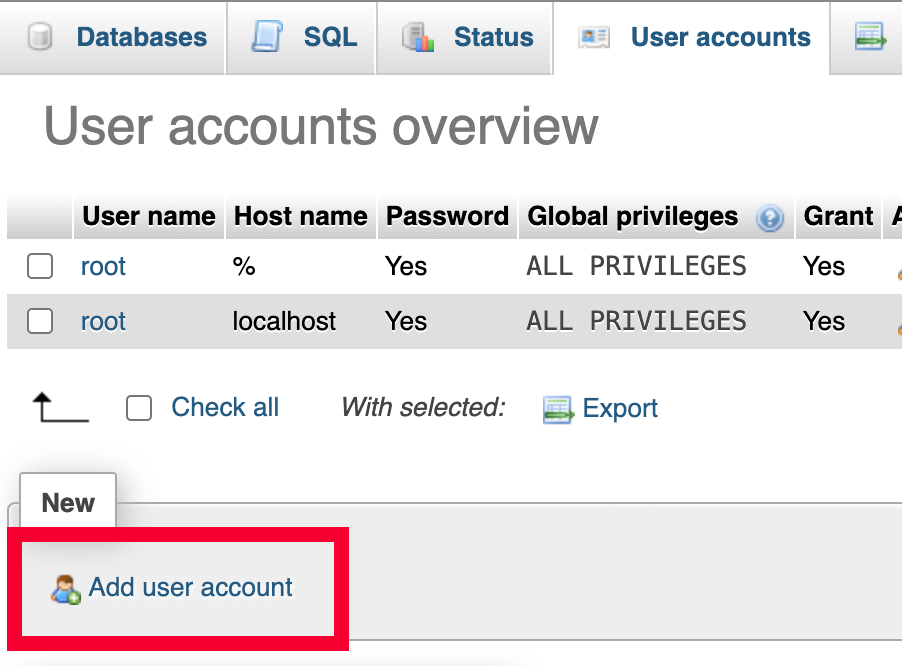
First, click on User accounts in the top navigation:

Next, click on Add user account underneath the User accounts overview:
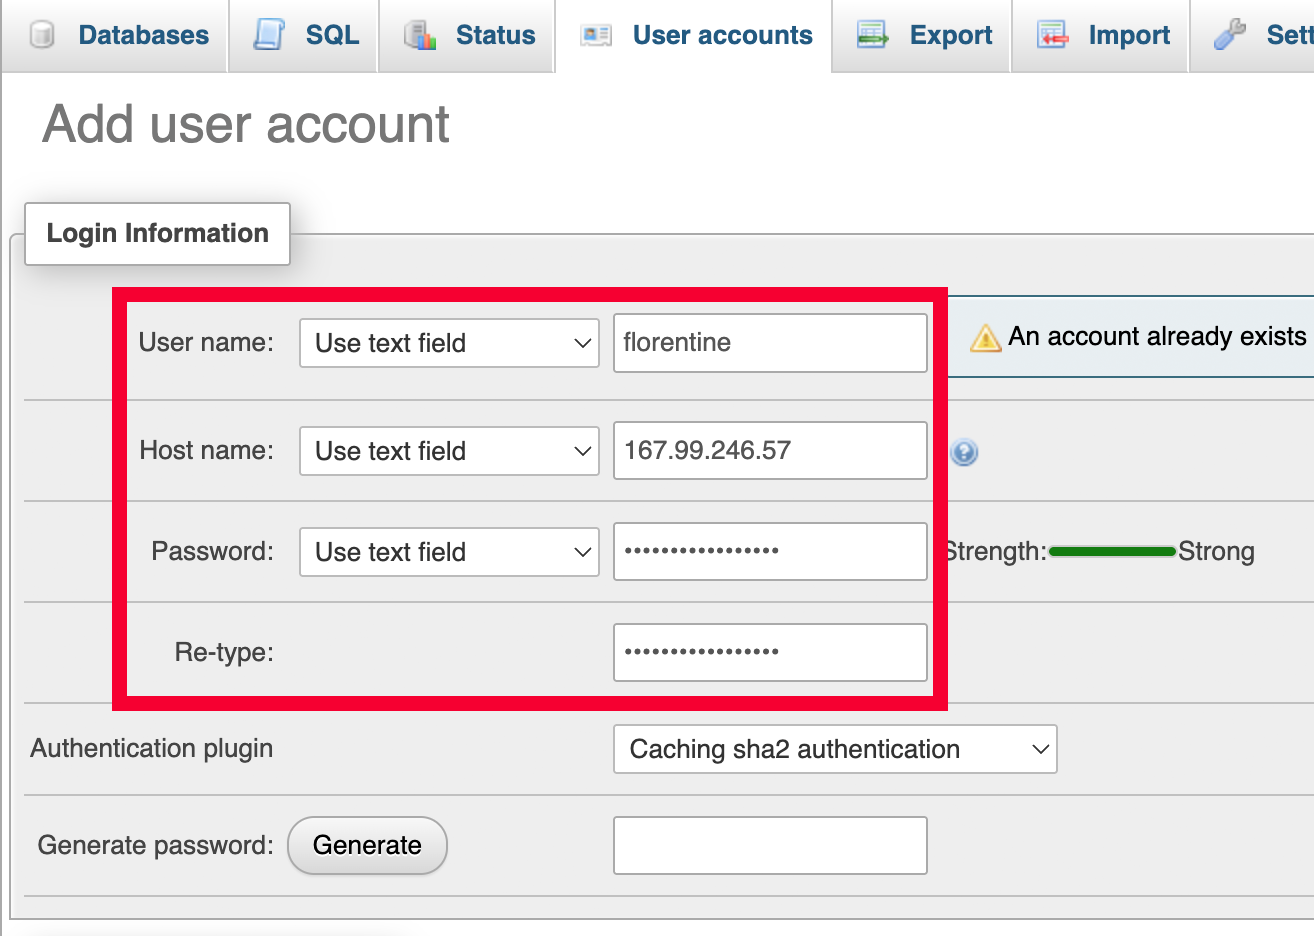
In the Login information section, fill in a User name(i.e. florentine), add the Florentine.ai IP 167.99.246.57 as Host Name and add a Password of your choice:
Scroll down to the Data section inside the Global privileges section, check SELECT and click on Go:

Important
You need to repeat the process to also grant access to the second Florentine.ai IP. Use the same User name and Password as before but set Host name to 209.38.238.253.
Grant database access
Navigate back to User accounts via the top navigation and click on Edit privileges next to the first user created in the previous step:

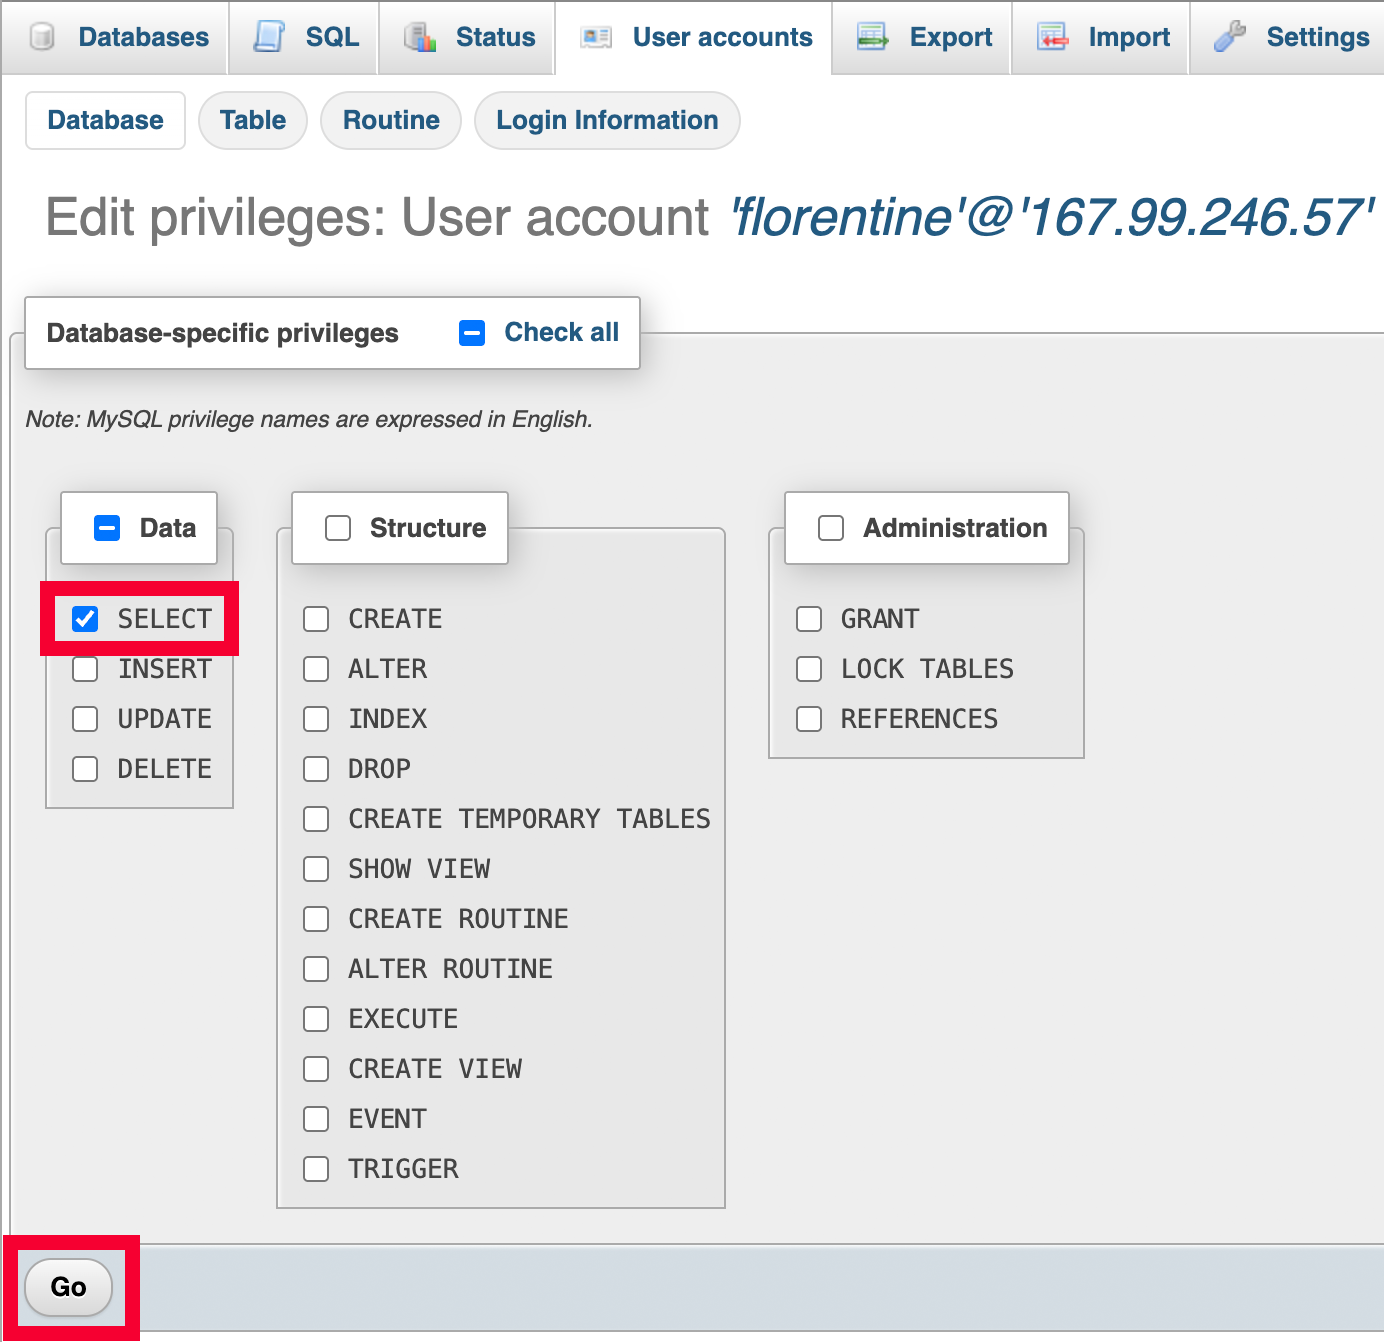
Click on the Database tab, select the database you want to add to Florentine.ai and click on Go:
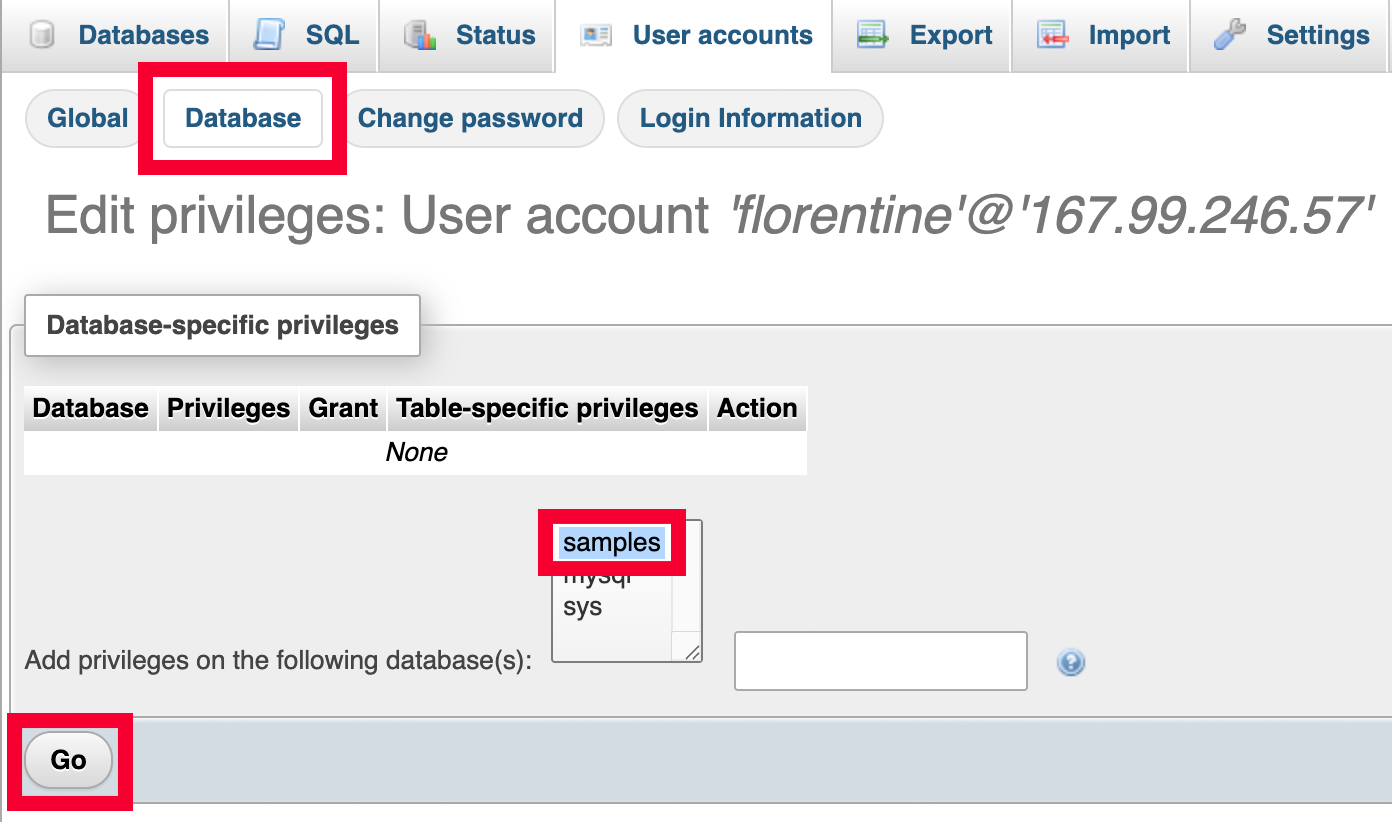
In the Data section inside the opening Database-specific privileges section, check SELECT and click on Go:
Important
You need to repeat the process for the second user you created to also grant database access to the second Florentine.ai IP.
Grant network access
phpMyAdmin only creates the database user. You might also need to configure your server firewall to allow the Florentine.ai IPs.
Follow the Grant network access section from the MySQL configuration via shell guide.
Create the connection string
You should now be able to create the connection string you need to add in your Florentine.ai account. The structure of the connection string looks like this:
mysql://<db_username>:<db_password>@<domain>:<port>/<db_name>Now you only need to replace <db_username>, <db_password>, <domain>, <port> and <db_name> with your settings, so your final connection string should look comparable to this:
mysql://florentine:supers%40fep%[email protected]:3306/samplesImportant
Your password must be URI encoded, so i.e. if your password is supers@fep@ssword you would provide the password inside the connection string as supers%40fep%40ssword.
Please note
You can usually find your domain and port inside the admin area of your hosting provider.
Enter your final connection string on the connect page in your Florentine.ai account, click on Connect and if everything is configured correctly you should see a list of the tables inside your database.