Claude integration guide
You can integrate Florentine into the Claude App as a local or a remote MCP server. To find out which is the best integration option for you, please refer to the MCP Server overview.
Integrate as a local MCP server
Please note
Local MCP Server integration only works with the Claude Desktop App, it is not supported for Claude Mobile App or when using Claude inside your browser.
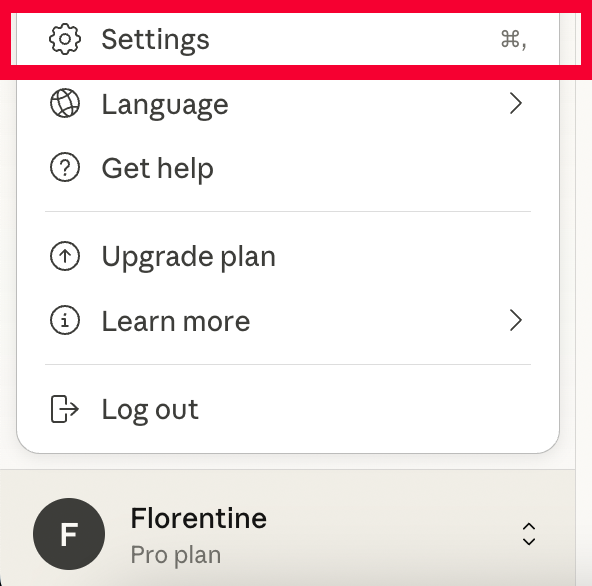
Open the Claude Desktop App, click on your username in the lower left corner and in the opening menu, click on Settings:
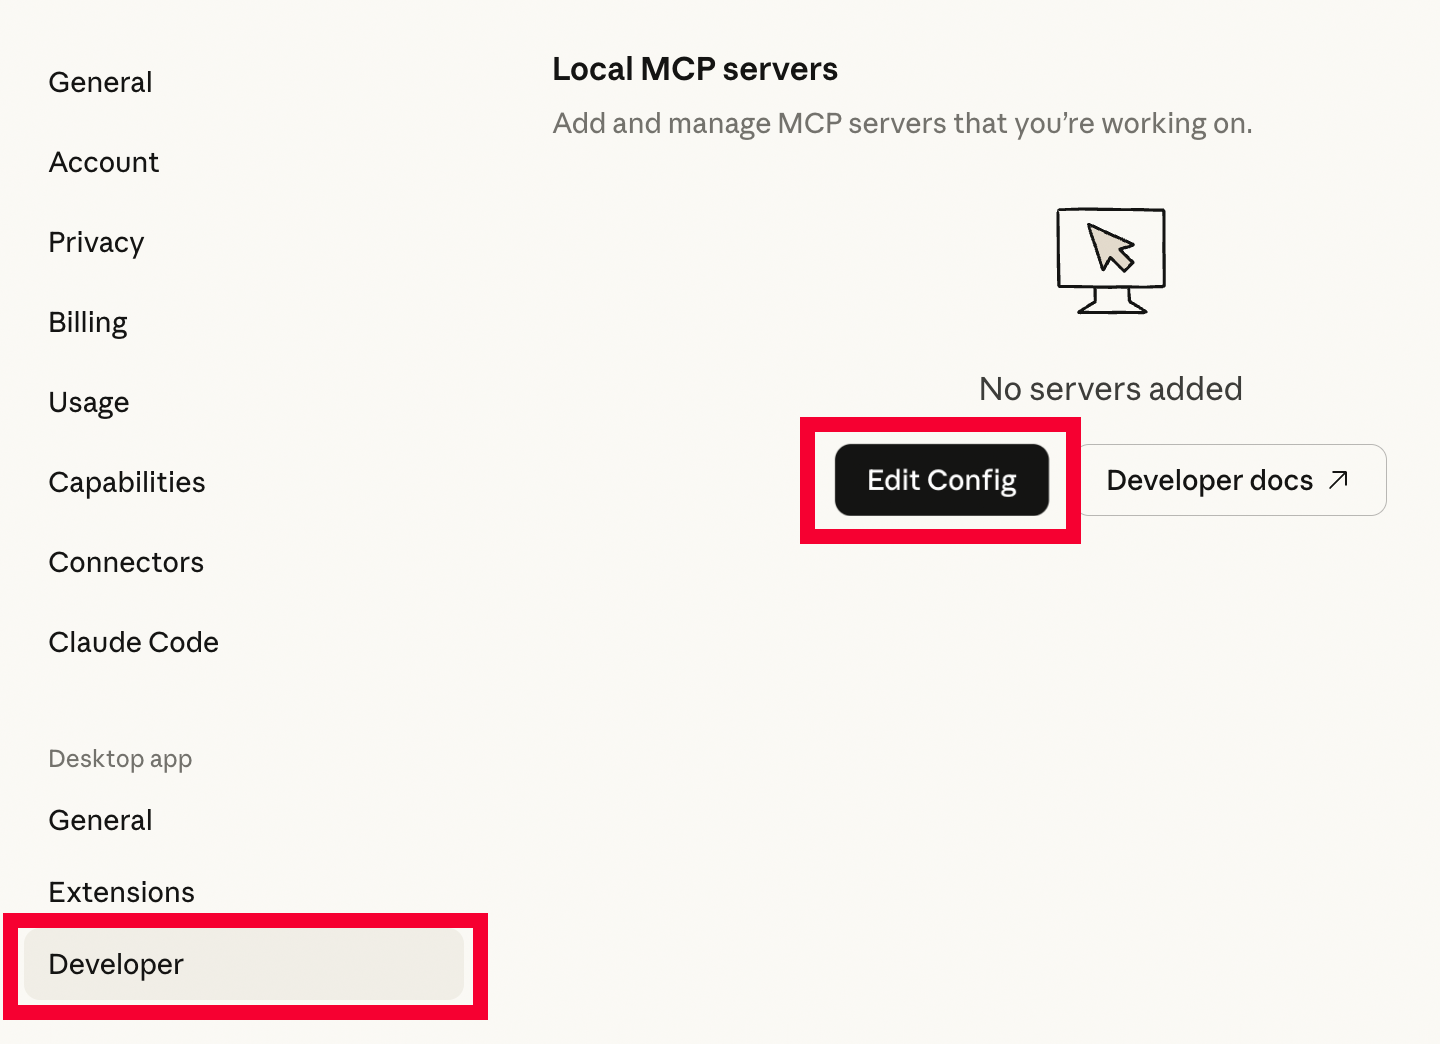
In the settings navigation, click on Developer to open the Local MCP Servers screen and click on Edit Config:
This will open a folder on your local filesystem where you can find the configuration file called claude_desktop_config.json. Open this file with your favourite text editor and add the Florentine local MCP server:
{
  "mcpServers": {
    "florentine": {
      "command": "npx",
      "args": ["-y", "@florentine-ai/mcp", "--mode", "static"],
      "env": {
        "FLORENTINE_TOKEN": "<FLORENTINE_API_KEY>"
      }
    }
  }
}
Please note
All additional configuration parameters (like Required Inputs) go in here as well.
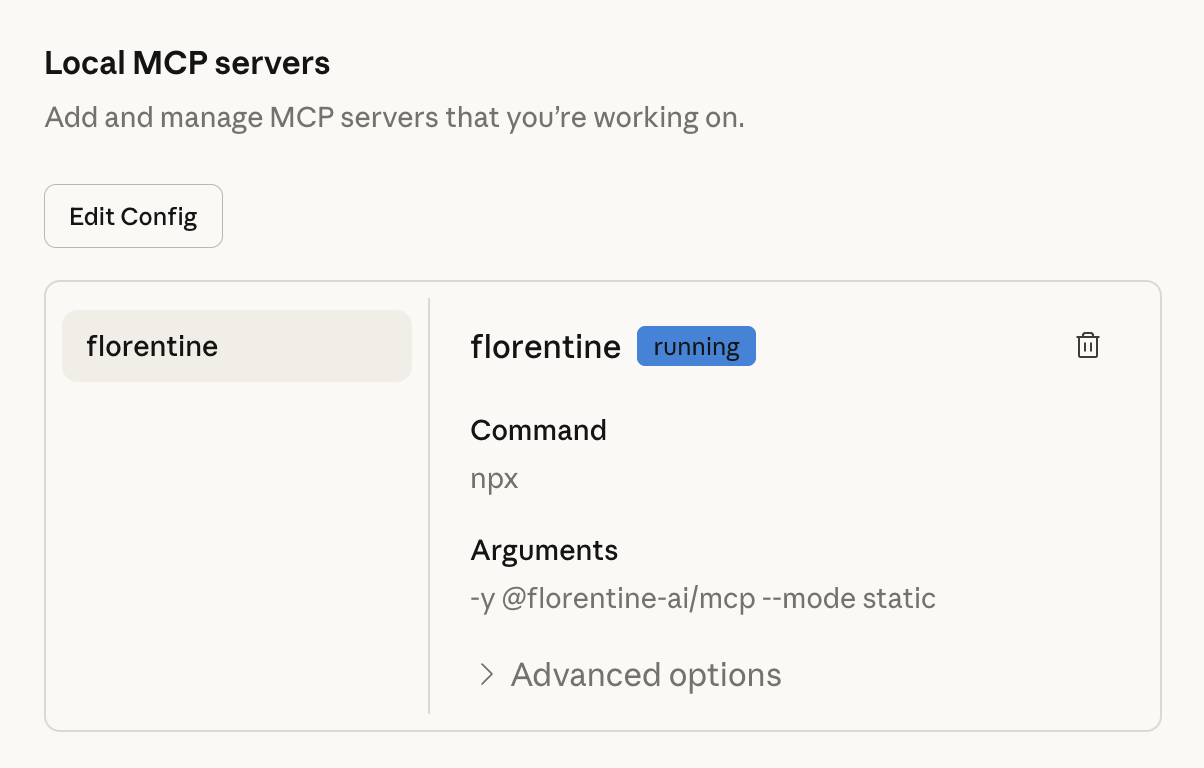
Next, save the file changes and restart your Claude Desktop App. After the restart, you should see the running Florentine MCP server on the Local MCP Servers screen:
Integrate as a remote MCP server
Open the Claude Desktop App, Claude Mobile App or Claude Website, click on your username in the lower left corner and in the opening menu, click on Settings:
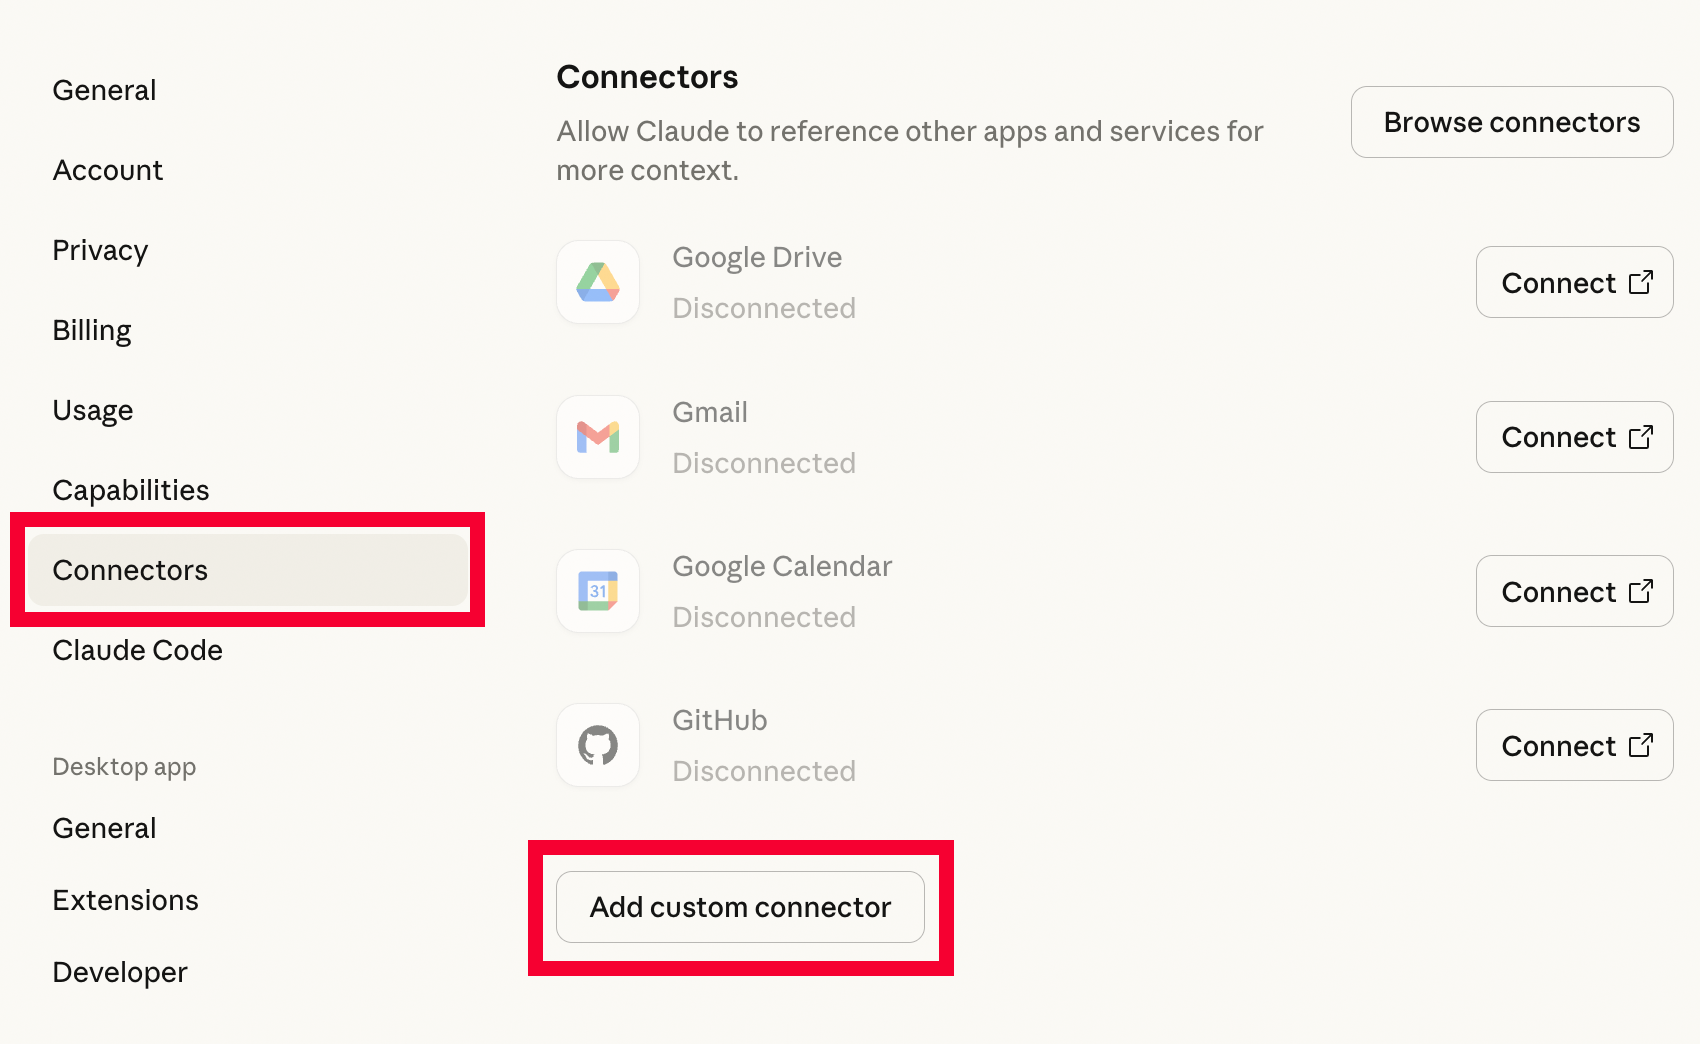
In the settings navigation, click on Connectors to open the Connectors screen and click on Add custom connector:
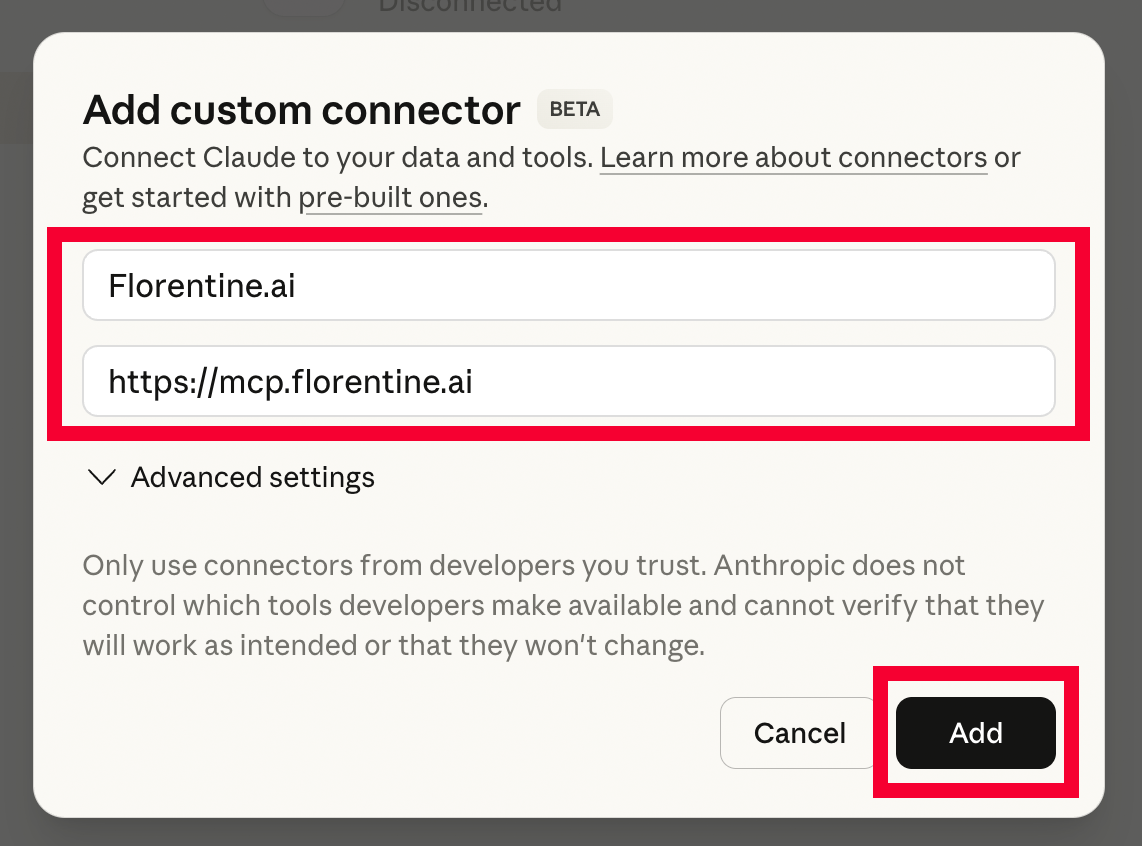
In the opening dialogue, enter Florentine.ai in the Name field and https://mcp.florentine.ai in the Remote MCP server URL field and click on Add:
If you are not automatically redirected to the Florentine website in your browser you might have to close the dialogue window and click on the Connect button next to the now created Florentine.ai connector:

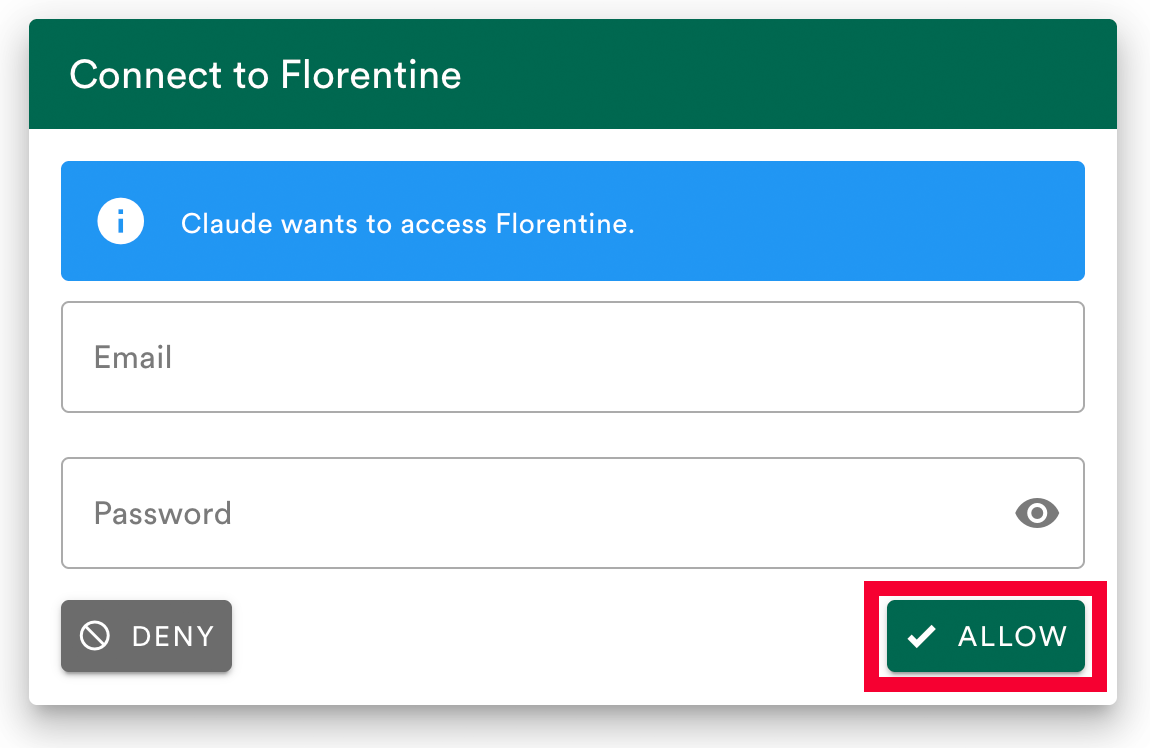
Either way, your browser has now opened the authorization flow on the Florentine website. You are asked to fill in your login credentials if you are not logged into your account. Then click on Allow to give Claude access to Florentine:
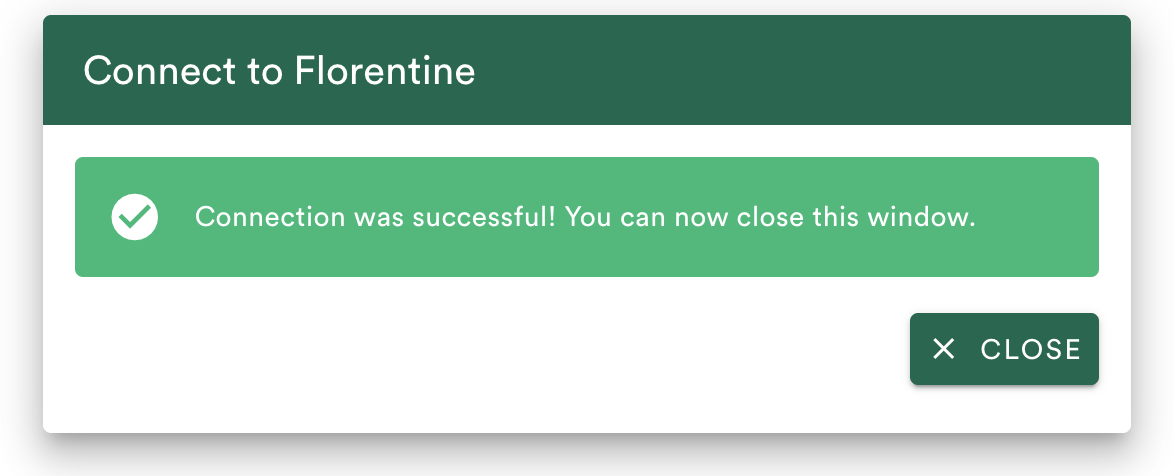
Finally you are either redirect to Claude showing you the successful connection and/or you see a success message from Florentine.ai: