Configure a MySQL connection to Florentine.ai via AWS RDS
This guide will take you through all the necessary steps needed to connect a MySQL database hosted on AWS RDS to Florentine.ai:
- Enable public accessibility
- Grant network access via Security Group
- Create a readonly user
- Grant database access
- Create the connection string
Important
Your RDS instance must be publicly accessible. Florentine.ai is a cloud-based service and cannot connect to instances that are only reachable within a private VPC. See the first step below if you are not sure.
Enable public accessibility
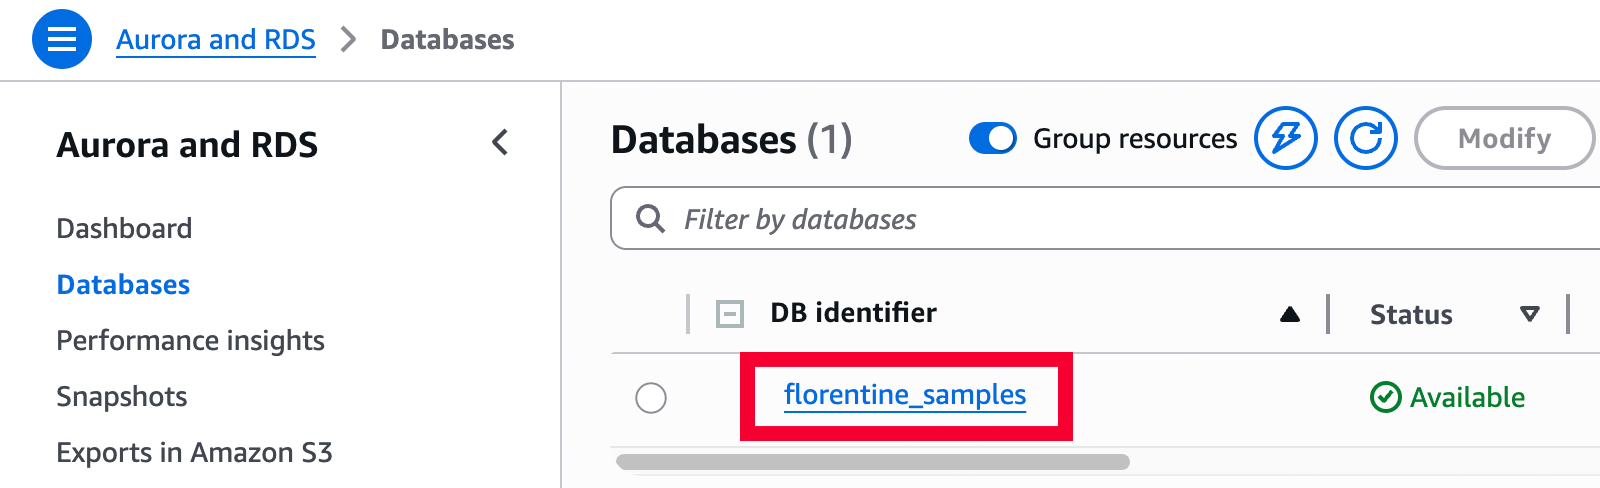
Open the AWS RDS Console and click on your DB instance:
Next, click on Modify in the top right corner:

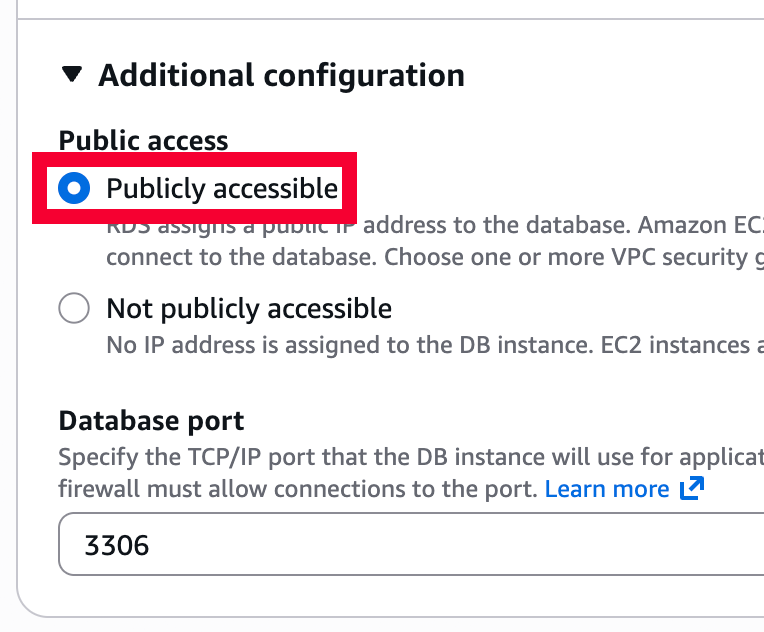
Scroll down to Connectivity, expand Additional configuration and set Public access to Publicly accessible:
Finally scroll down and click on Continue, then choose Apply immediately and confirm with Modify DB instance:

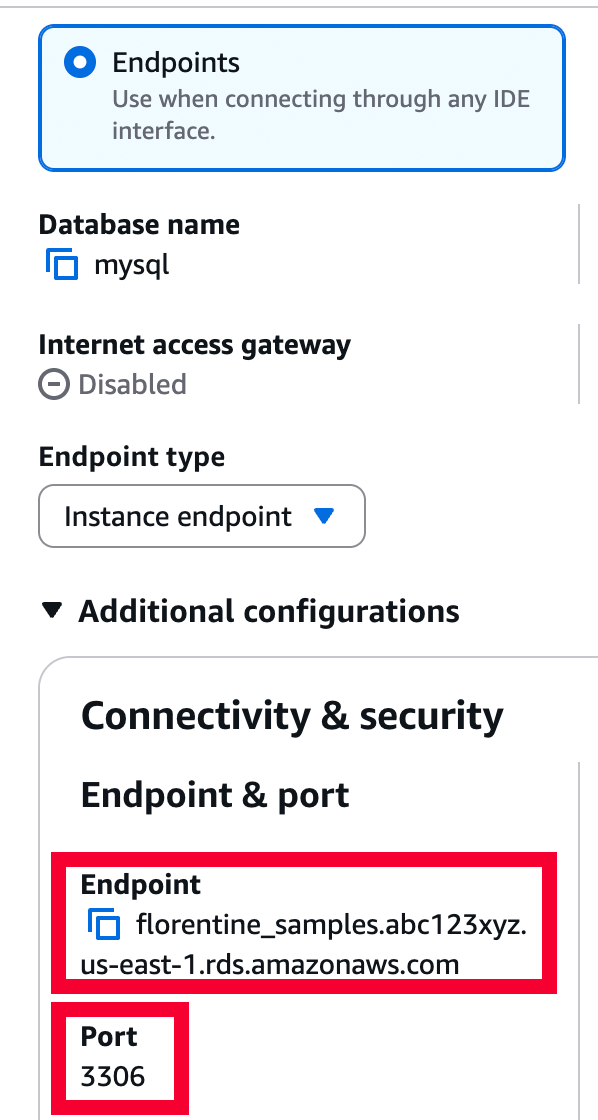
After the modification is complete, go back to the instance details, navigate to the Connectivity & security tab, select Endpoints and under Additional configurations, copy the Endpoint and Port, you will need it for the connection string later:
Grant network access via Security Group
RDS uses AWS Security Groups to control inbound traffic. You need to allow the Florentine.ai IP addresses to reach your MySQL port (default port is 3306).
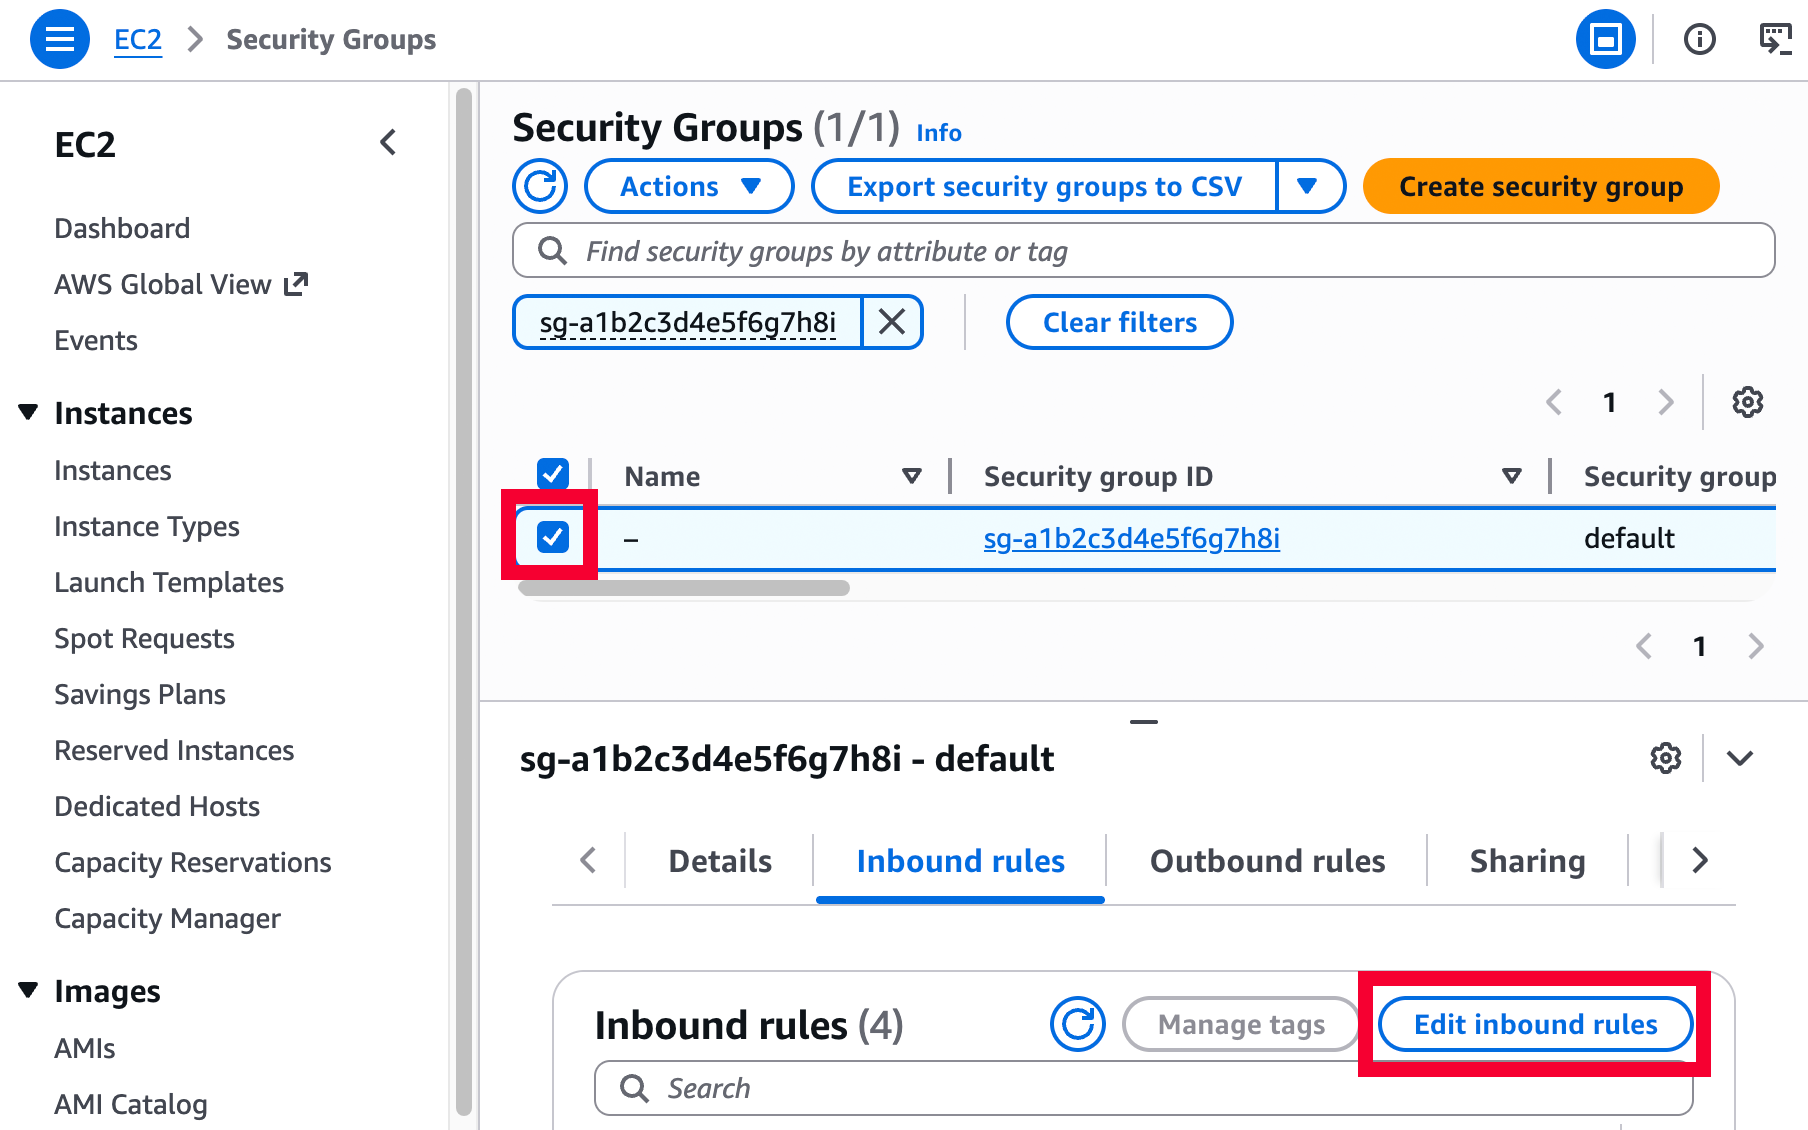
On the instance details page, navigate to the Connectivity & security tab, scroll down to Security group rules and select a security group:
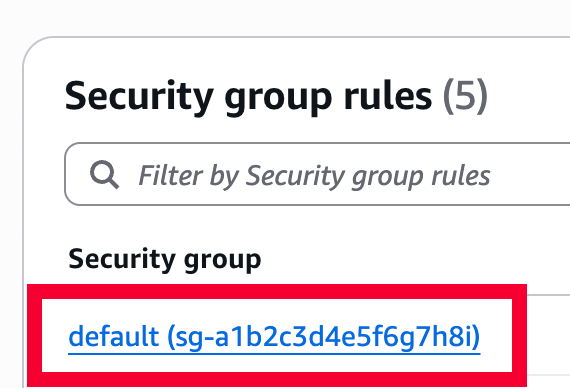
Select the security group and click on the Edit inbound rules button:
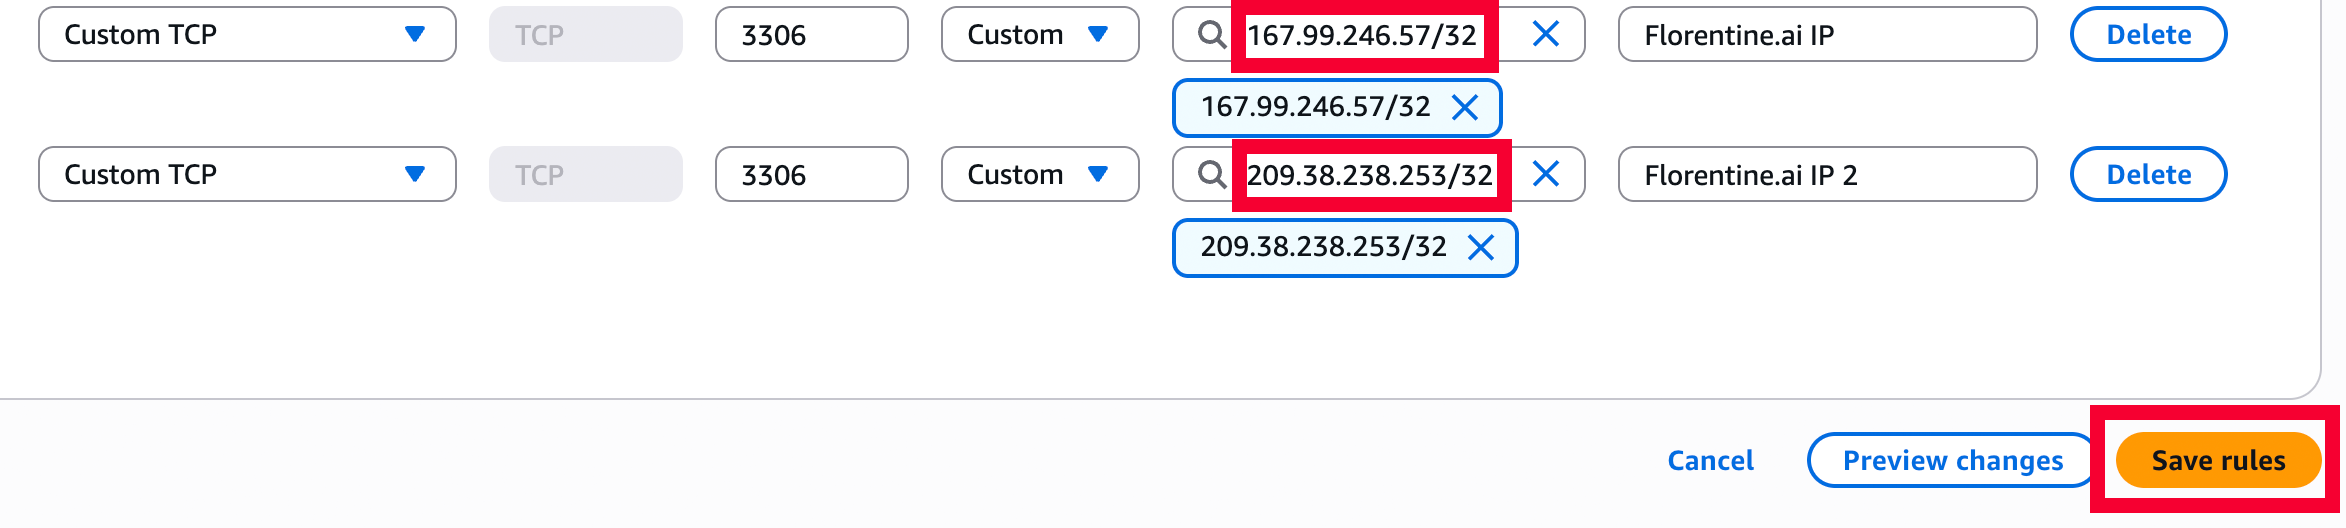
Next, click on Add rule twice, choose Custom TCP, enter the port (default is 3306), the two Florentine.ai IPs 167.99.246.57/32 and 209.38.238.253/32 and click on Save rules:
Create a readonly user
Connect to your RDS instance via the MySQL shell. Replace <rds_endpoint> and <rds_port> with the endpoint and port you copied earlier and <admin_user> with your RDS master username (usually admin):
mysql --user <admin_user> --password --host <rds_endpoint> --port <rds_port>Run the following commands to create a read-only user restricted to the Florentine.ai IP addresses 167.99.246.57 and 209.38.238.253. Replace <db_username> with a username (e.g. florentine) and <db_password> with a strong password. MySQL requires a separate entry for each IP, make sure that you use the same username and password for both IPs.
Also copy the username and password because you need them for the connection string later:
CREATE USER '<db_username>'@'167.99.246.57' IDENTIFIED BY '<db_password>';
CREATE USER '<db_username>'@'209.38.238.253' IDENTIFIED BY '<db_password>';
Grant database access
Grant read-only access to the specific database. Replace <db_name> with your actual database name and <db_username> with the username created in the previous step:
GRANT SELECT ON <db_name>.* TO '<db_username>'@'167.99.246.57';
GRANT SELECT ON <db_name>.* TO '<db_username>'@'209.38.238.253';
Apply the changes:
FLUSH PRIVILEGES;Create the connection string
You should now be able to create the connection string you need to add in your Florentine.ai account. The structure of the connection string looks like this:
mysql://<db_username>:<db_password>@<rds_endpoint>:<rds_port>/<db_name>Replace <db_username>, <db_password>, <rds_endpoint>, <rds_port> and <db_name> with your settings, so your final connection string should look comparable to this:
mysql://florentine:supers%40fep%[email protected]:3306/samplesImportant
Your password must be URI encoded. For example, if your password is supers@fep@ssword you would write it as supers%40fep%40ssword in the connection string.
Enter your final connection string on the connect page in your Florentine.ai account, click on Connect and if everything is configured correctly you should see a list of the tables inside your database.